You’re about to discover the ultimate cleaning hack for your favorite pair of Hokas. Whether you’re an avid runner, a casual walker, or anything in between, keeping your Hokas clean is essential to prolonging their lifespan and maintaining their performance. With “The Foolproof Method for Cleaning Hokas Everyone Should Know,” you’ll learn the simple steps to effortlessly remove dirt, stains, and odor, so you can always step out in fresh, pristine kicks. Say goodbye to dirty shoes and hello to a cleaner, more stylish look. Get ready to elevate your shoe game with this foolproof cleaning method. If you’re a Hoka fan, you know that these shoes are a game-changer when it comes to running and walking. They offer unparalleled comfort and support, ensuring that your feet stay happy and healthy. But with all that time spent pounding the pavement, your Hokas are bound to collect some dirt and grime. To keep them looking fresh and performing at their best, it’s important to know how to clean them properly. In this article, we’ll walk you through a foolproof method for cleaning your Hokas that will have them looking as good as new in no time.
Preparation
Before diving into the cleaning process, it’s important to gather all the necessary supplies. You won’t want to be running around searching for items once you’ve started. Make sure you have the following:
Gather the necessary supplies
- A soft-bristle brush
- A cloth or sponge
- Mild detergent or shoe cleaner
- Baking soda
- Crumpled paper
- A toothbrush (optional)
Once you have all your supplies ready, it’s time to prepare the cleaning area. Find a well-ventilated space where you can comfortably clean your shoes without worrying about making a mess. Lay down a towel or some newspapers to protect the surface and prevent any cleaning solutions from staining.
Removing Loose Dirt
The first step in the cleaning process is removing any loose dirt and debris from your shoes. This will help prevent scratching or further spreading dirt while you clean. Follow these steps:
Remove the shoe laces
Start by removing the shoe laces to ensure easier access to the entire shoe surface.
Brush off dirt and debris
Take your soft-bristle brush and gently brush off any dirt or debris that may have accumulated on the upper or midsole. Be sure to pay attention to the seams and crevices where dirt tends to get stuck.
Tap the shoes together
Once you’ve brushed off as much dirt as possible, tap the shoes together to shake off any remaining loose dirt. This will help ensure a cleaner surface for the next steps.
Cleaning the Upper
Now that you’ve removed the loose dirt, it’s time to dive into cleaning the upper of your Hokas. Follow these steps:
Create a cleaning solution
Fill a small container with water and add a small amount of mild detergent or shoe cleaner. Mix it gently until it creates a soapy solution.
Dip a cloth or sponge in the solution
Take your cloth or sponge and dip it into the cleaning solution. Make sure it’s saturated but not dripping.
Gently scrub the upper
Starting from the top of the shoe, gently scrub the upper in a circular motion. Pay extra attention to any stains or areas with built-up dirt. Be careful not to scrub too hard, as this could damage the material.
Use a soft-bristle brush for tougher stains
For tougher stains or hard-to-reach areas, you can use a soft-bristle brush. Dip the brush into the cleaning solution and gently scrub the stained area. Remember to be gentle to avoid causing any damage.
Cleaning the Midsole
The midsole of your Hokas is another area that requires attention. Here’s how to effectively clean it:
Remove the insoles if possible
If your shoes have removable insoles, take them out before cleaning to ensure a thorough clean.
Wet a cloth or sponge with the cleaning solution
Using the same cleaning solution as before, wet a cloth or sponge and gently squeeze out any excess liquid.
Gently wipe the midsole
Wipe the midsole of your Hokas with the cloth or sponge, focusing on any areas with visible dirt or stains. Be sure to cover the entire midsole, including the sides and bottom.
Scrub with a soft-bristle brush if needed
For stubborn stains or difficult-to-remove dirt, you can use a soft-bristle brush to scrub the midsole gently. This can help lift away any grime and restore the midsole’s original appearance.
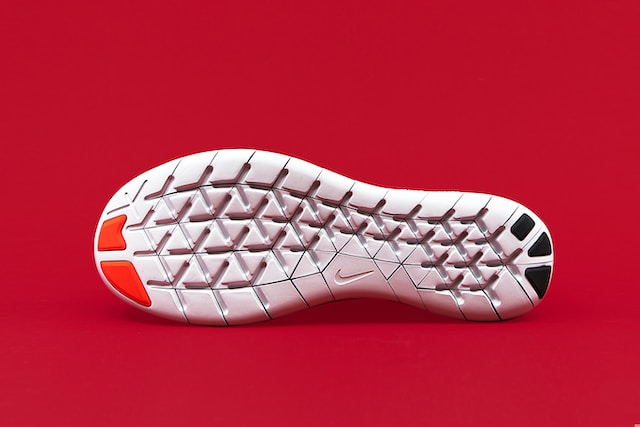
Cleaning the Outsole

The outsole of your Hokas is the part that comes into direct contact with the ground, so it’s important to give it a thorough clean. Here’s how:
Rinse off loose dirt and debris
Start by rinsing off any loose dirt and debris from the outsole. You can do this by running the shoes under lukewarm water or using a hose. Be sure to remove as much dirt as possible before moving on to the next step.
Apply the cleaning solution to a brush
Take your soft-bristle brush and apply a small amount of the cleaning solution to it. Make sure the brush is damp but not soaked.
Scrub the outsole
Using the brush, scrub the outsole of your Hokas in a circular motion. Pay attention to any areas with visible dirt or stains. Continue scrubbing until the outsole looks clean and free from debris.
Use a toothbrush for hard-to-reach areas
For those hard-to-reach areas, such as the grooves and crevices of the outsole, a toothbrush can come in handy. Apply some cleaning solution to the toothbrush and use it to gently scrub away any dirt or grime that may be lurking in these tight spaces.
Drying
After cleaning your Hokas, it’s essential to let them dry properly to avoid any damage or unpleasant odors. Here’s how to dry them effectively:
Air dry the shoes
Place your cleaned Hokas in a well-ventilated area and allow them to air dry. Avoid direct sunlight and any sources of heat, as these can cause the materials to warp or shrink.
Stuff them with crumpled paper to help maintain their shape
To help your shoes retain their shape while drying, stuff them with crumpled newspaper or tissue paper. This will also help absorb any excess moisture and speed up the drying process.
Dealing with Odors
If your Hokas have a lingering odor, don’t worry – there’s a simple solution. Just follow these steps:
Sprinkle baking soda inside the shoes
Take some baking soda and sprinkle it generously inside each shoe. Baking soda is known for its ability to absorb odors.
Let the baking soda sit overnight
After sprinkling the baking soda, let your shoes sit overnight to allow the baking soda to do its magic. This will give it enough time to absorb any unpleasant odors.
Remove the baking soda
The next day, gently tap the shoes together to remove any excess baking soda. If necessary, use a soft-bristle brush or cloth to wipe away any remaining residue.
Cleaning the Insoles
Cleaning the insoles of your Hokas is essential to maintain their freshness and prevent odors. Here’s how to do it:
Remove the insoles from the shoes
If your shoes have removable insoles, take them out before cleaning. This will allow you to clean them thoroughly and prevent any damage to the shoes themselves.

Create a mixture of mild detergent and water
In a small bowl, mix a small amount of mild detergent with warm water. Stir the mixture gently until the detergent is dissolved.
Soak the insoles in the mixture
Place the insoles in the mixture and allow them to soak for a few minutes. This will help loosen any dirt or grime that may be embedded in the fabric.
Gently scrub the insoles
Using a soft-bristle brush, gently scrub the insoles to remove any remaining dirt or stains. Pay attention to any particularly dirty areas and continue scrubbing until the insoles look clean.
Handling Tough Stains
Sometimes, regular cleaning methods may not be enough to tackle tough stains on your Hokas. Here are some tips for dealing with different types of stains:
Identify the type of stain
Before attempting to remove a stain, it’s important to identify what caused it. Different stains require different treatment methods, so knowing the source of the stain will help you choose the right cleaning method.
Treat oil-based stains with dish soap
If your Hokas have oil-based stains, such as grease or oil marks, dish soap can be an effective solution. Apply a small amount of dish soap directly to the stain and gently scrub it with a soft-bristle brush. Rinse thoroughly with water to remove any soap residue.
Use vinegar for sweat or urine stains
For sweat or urine stains, white vinegar can work wonders. Dilute equal parts vinegar and water, then apply the mixture directly to the stain. Gently scrub the area with a soft-bristle brush and rinse thoroughly with water.
Apply a paste of baking soda and water for general stains
For general stains, such as dirt or grass stains, a paste of baking soda and water can help lift away the grime. Mix baking soda with water until it forms a paste, then apply it directly to the stain. Let it sit for a few minutes, then scrub gently with a soft-bristle brush. Rinse thoroughly with water to remove any residue.
Maintaining the Hokas
To keep your Hokas in top condition for as long as possible, it’s important to maintain them properly. Here are some tips to help you in this regard:
Keep the shoes clean after each use
After each run or walk, take a few minutes to remove any loose dirt or debris from your Hokas. This will help prevent stains and make the cleaning process easier when it’s time for a thorough clean.
Avoid machine washing
While it may be tempting to toss your Hokas in the washing machine for a quick clean, it’s best to avoid this. The agitation and heat from the machine can cause damage to the materials and affect the cushioning and overall performance of the shoes.
Store them properly to prevent damage
When you’re not wearing your Hokas, it’s important to store them properly to prevent any damage. Keep them in a cool, dry place away from direct sunlight and extreme temperatures. Avoid storing them in a cramped space where they can lose their shape.
By following these foolproof steps for cleaning your Hokas, you can ensure that they stay looking fresh and performing at their best for years to come. With a little bit of effort and the right tools, you’ll have your Hokas ready to hit the pavement again in no time. Happy running!


